Project 6
|
|
Overview:
Credit for images:
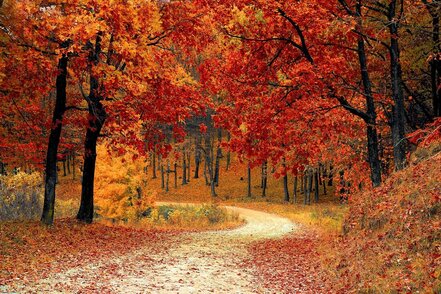
https://pixabay.com/photos/fall-autumn-red-season-woods-1072821/ - Fall
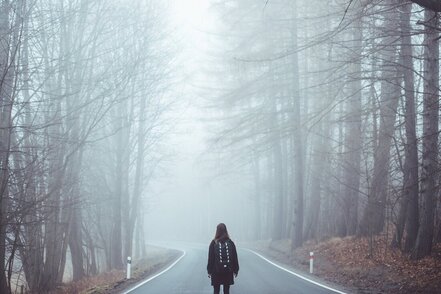
https://pixabay.com/photos/fog-mist-road-lost-girl-eerie-1208283/ - Fog and Girl
https://drive.google.com/file/d/165piCw5nPHnIqvVJbQNRI5muMCvzFPF9/view - Portal
Grunge Frame
Tools Used: Quick Select, Brushes, Opacity, Screen Effect, Layer Mask, Curves, Hue and Saturation, liquefy.
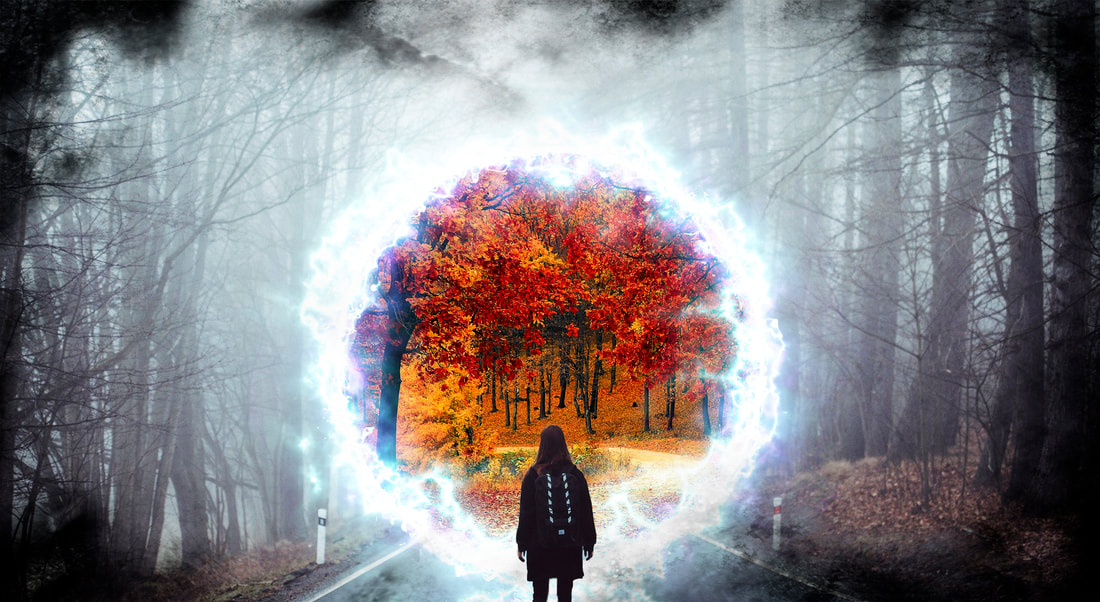
- This week we needed to remove someone from the background and place them somewhere else. I have seen others create a portal and so I wanted to see if I could do the same while at the same time trying to cut someone out of the background. When I saw the original image I thought it was a great picture and really captured the essence of being lost. I wanted to turn that around and create a feeling of being found. I loved the contrast in the two pictures and felt that the end product turned out great.
- The process of creating this image was enjoyable, I have found that I like combining pictures together and creating a different reality. after I found the original image I needed to find a portal which I did by going onto YouTube and looking at other Photoshop tutorials on portals. One caught my eye and had a file of a portal prepped and ready. I used that image and used the screen effect on the image which stripped out the black and left the white on top of my original image. I created layer masks to block out what I didn't want and to enhance what was needed. One thing of note was the girl was very light because of the fog. I used the hue and saturation to darken her so she contrasted more with the background. I tried several different images within the circle but felt that with the fall portal it was like looking back in time. I had to move the left bank down as in the original image it was going up and didn't match the first image. In the end I ended up putting a grunge border on the image to help darken the mood on the edges and bring more focus on the portal.
Credit for images:
https://pixabay.com/photos/fall-autumn-red-season-woods-1072821/ - Fall
https://pixabay.com/photos/fog-mist-road-lost-girl-eerie-1208283/ - Fog and Girl
https://drive.google.com/file/d/165piCw5nPHnIqvVJbQNRI5muMCvzFPF9/view - Portal
Grunge Frame
Tools Used: Quick Select, Brushes, Opacity, Screen Effect, Layer Mask, Curves, Hue and Saturation, liquefy.
